


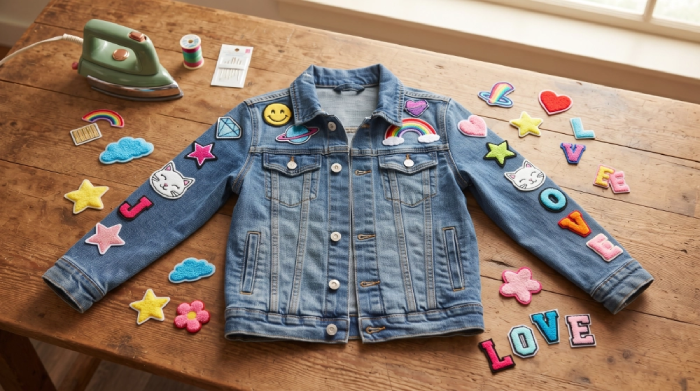
Quick answer: The most reliable spots for patches for clothes are the left chest (classic, works on almost anything), the sleeve or shoulder (bold, storytelling), the back panel (one large statement patch), and pockets or hems on jeans and bags. Beyond clothing, patches also work well on cushions, blankets, cork boards, bags, hats, and shoes as long as the surface can handle stitching or heat.
You finally have the patches. A stack of them, maybe some embroidered, some woven, one you’ve been saving for the “perfect spot” for months. Now you’re staring at a jacket, a backpack, or a plain pair of jeans, stuck on one question: where do you actually put patches for clothes so they look intentional instead of accidental?
That hesitation is normal. Patch placement is the difference between a piece that looks styled on purpose and one that looks decorated at random. The good news: placement isn’t guesswork. It follows patterns that stylists, streetwear brands, and DIY crafters have relied on for years. Once you know them, you won’t look at a blank jacket sleeve the same way again.
This guide covers the classic placements, the bold ones, the unexpected ones, and the mistakes that quietly ruin a good patch. If you haven’t picked a patch style yet, this types of patches for clothing guide is worth a quick read before you plan placement the material (embroidered, chenille, leather, PVC) affects where a patch can realistically go.
At a Glance: Best Patch Placement by Item
| Item | Best Spot | Why It Works | Patch Type That Suits It Best |
|---|---|---|---|
| Jacket (denim/bomber) | Left chest or full back | Chest = subtle, back = statement | Embroidered, chenille |
| Jeans | Knee, back pocket, or thigh | Hides wear or adds streetwear edge | Sew-on, iron-on for sturdy denim |
| Backpack/bag | Front flap or clustered on pockets | High visibility, easy to swap | Woven, velcro |
| Cap/hat | Front panel, center | Most-seen spot on any cap | Leather, embroidered |
| Sweatshirt/hoodie | Chest or sleeve | Reads as merch-style branding | Embroidered, 3D puff |
| Shoes | Tongue or heel tab | Small canvas, subtle detail | Small woven or PVC |
| Cushion/blanket | Centered or gallery cluster | Turns keepsakes into decor | Any sew-on patch |
Use this as a starting point, then read on for the reasoning behind each placement because why a spot works matters more than the spot itself once you start mixing patches.
1. Chest & Upper Front (Classic and Clean)

The chest is the original home for a patch, and for good reason. It’s the first place anyone’s eye lands, it works on almost any garment, and it reads as tidy rather than chaotic.
- Left chest, over the heart the traditional “logo spot” on jackets, workwear, and uniforms. One patch here says brand, team, or identity without shouting.
- Centered on a t-shirt or hoodie a single statement patch sits like a graphic tee print: bold, but not busy.
- Just above the pocket a small favorite for shirts and jean jackets; it looks deliberate because it follows the garment’s existing lines instead of fighting them.
Expert tip: Chest placement is also the most durable long-term, since it’s the area that flexes and creases the least during normal wear. If you’re patching something you plan to keep for years, start here.
This is the safest starting point if you’re new to placing personalized clothing patches.
2. Sleeves & Shoulders (Bold but Stylish)
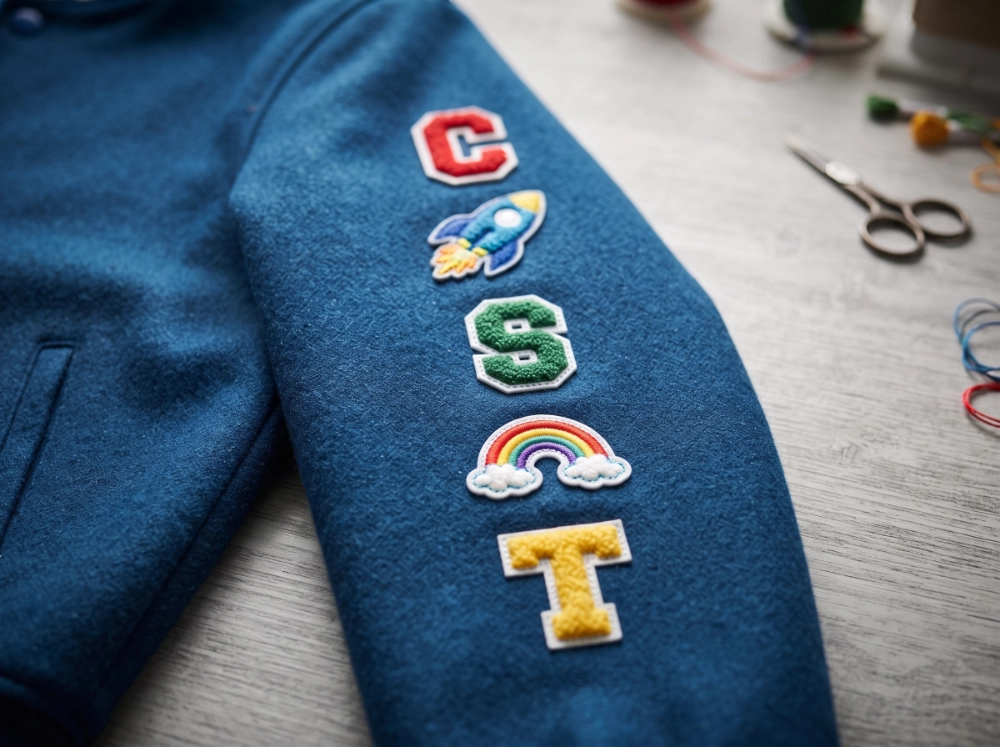
Sleeves are where patches start to feel like storytelling rather than decoration. This is prime real estate for military-style patches, travel badges, and anything with a bit of attitude.
- Upper shoulder/bicep mirrors military and varsity patches, like rank insignia, unit crests, or a morale patch collection.
- Vertical sleeve placement patches run in a line down the outer sleeve seam, popular right now on denim and bomber jackets.
- Cuff patches small patches near the wrist add a subtle detail that only shows up when you reach for something.
Sleeves are also the go-to spot for letterman jacket patches, where several smaller patches (years, initials, achievements) are arranged in a cluster rather than scattered randomly.
3. Backpacks & Bags (High Visibility, Low Effort)

If you want maximum visibility for minimum commitment, bags win every time. Nobody has to see the inside of your closet to notice a patch on the bag you carry daily.
- Front flap or top pocket the “billboard” spot, the first thing people see.
- Side pockets or straps good for smaller patches, pins, or velcro patches you like to swap seasonally.
- Clustered gallery style several patches grouped together turns a plain bag into a personal scrapbook, which is exactly why hikers, students, and travelers made this look a staple an American flag patch alongside a few travel badges is a classic starting combination.
Bags are also the easiest place to experiment with backing type, since a woven patch or hook-and-loop patch can be swapped without any sewing.
4. Jeans & Pants (Streetwear Favorite)
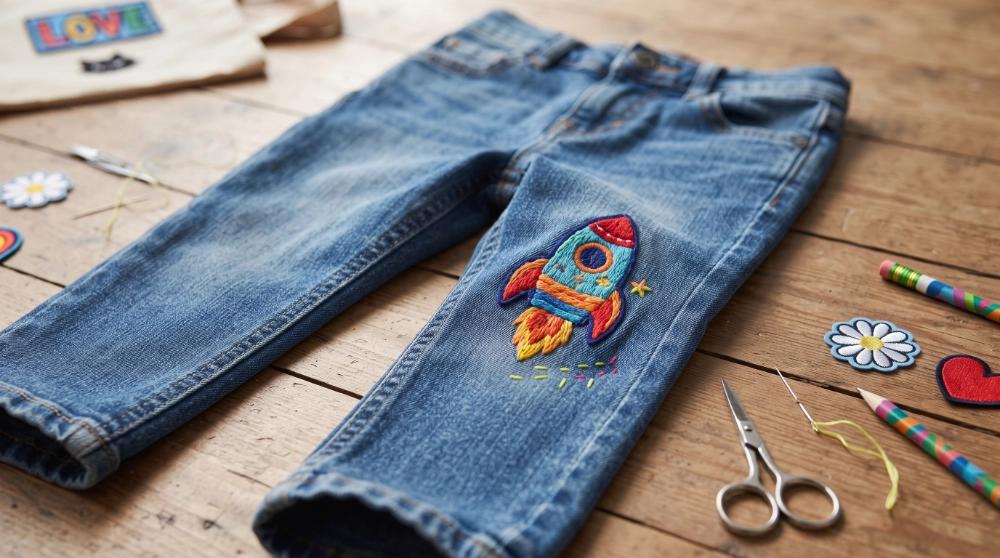
Patch jeans have gone from a repair trick to a full style statement, and placement here does double duty it can hide damage or simply add flair.
- Knees The traditional spot, originally used to patch over holes, now used just as often for the look alone.
- Back pockets Bold, easy to see when walking away, a favorite for logo or lettering patches.
- Front thigh Gives off a rebellious, streetwear edge, especially with oversized or graphic patches.
- Hem or ankle cuff A quieter option for anyone who wants a hint of personality rather than a statement.
If you’re repairing a rip rather than just decorating, fabric matters. Denim and canvas hold iron on patch adhesive far better than thin or stretchy material. For heavier patch work on jeans or even patch work on a dress sewing the edges down after ironing adds years to the patch’s life. If the adhesive alone feels too weak for a high-movement area, a dab of fabric glue for patches along the very edge (not the whole back) adds extra hold without stiffening the patch
5. Hats & Caps (Small but Powerful)

Small canvas, big impact. A cap is basically a moving billboard, which is why custom patches on headwear have become one of the most popular categories in patch design.
- Front panel The classic, most-seen spot on any cap.
- Side panel A quieter, slightly off-center placement that still reads clearly.
- Back panel or strap Subtle, often used for a small logo, initial, or date.
Because hats are curved and get handled constantly, they need patches designed to hold up. This is where custom hat patches and leather patch hats shine leather and tightly stitched embroidery resist the everyday wear a cap goes through.
6. Full Back Statement (For the Brave)

Sometimes you don’t want a hint you want a headline. The back panel of a denim jacket, bomber, or vest is the largest flat surface most garments offer, and it’s built for one bold, oversized patch rather than several small ones.
This is the placement for:
- A large logo, artwork piece, or club/crew emblem
- A single centered design rather than a cluster (crowding the back tends to look unfinished)
- 3D puff embroidered patches, which have enough texture and size to hold their own on a big canvas
Measure first. A patch too small looks lost on a full back panel; one too large can crowd seams and pockets underneath.
7. Unexpected Places (Creative Edge)
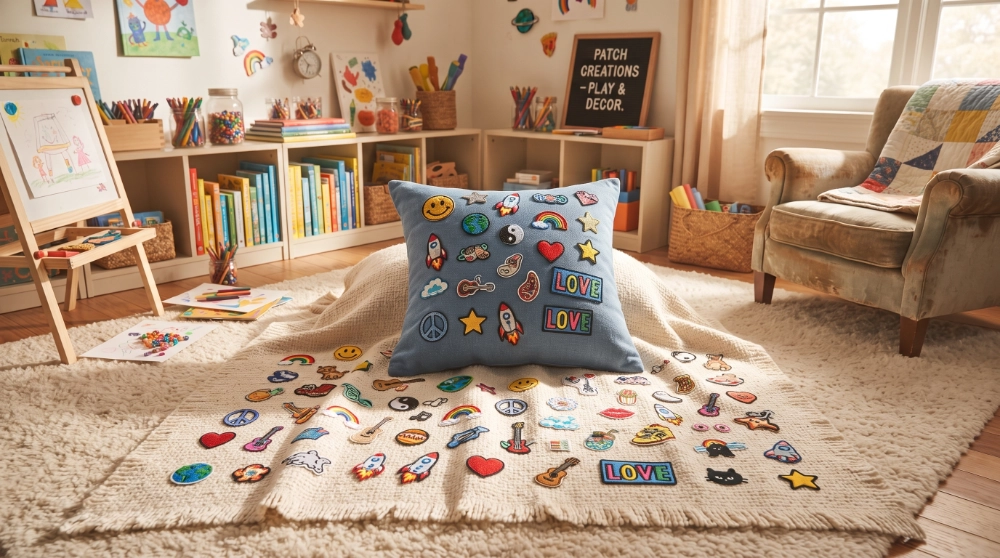
This is where patch placement stops being about clothes altogether and starts being about anything with fabric. Once you start looking, patches work almost everywhere:
- Patch cushions A themed throw pillow (travel patches, concert patches, a kid’s swimming badges) turns a memory collection into home decor instead of a drawer full of forgotten patches.
- Patch blankets or memory quilts Patches sewn onto a blanket over the years become a wearable (or cuddle-able) timeline, popular as keepsakes for milestones and travel.
- Patch cork board display Instead of pinning patches to a board, patches get sewn onto a fabric-covered board for a textured, gallery-style display.
- Patch fabric wall banners A more polished cousin of the cork board: a single hanging banner curated with a collector’s favorite pieces, almost like framed art.
- Patch capes or ponchos An oversized, dramatic canvas where large or clustered patches become the entire design of the garment.
- Upcycled patched furniture Chairs, ottomans, and even headboards get a second life when patches are added to worn-out upholstery, as functional as it is decorative.
- Patches on shoes Canvas sneakers and boots take small patches surprisingly well, usually on the tongue, side panel, or heel tab.
- Patches on other homewares Tote bags, aprons, curtains, and even lampshades increasingly show up with patches sewn or ironed on for a handmade, lived-in look.
The common thread across all of these? Patches don’t need a “correct” surface. They need a surface sturdy enough to hold them, and a placement that respects the shape of the object underneath which brings us to the mistakes worth avoiding.
Common Patch Placement Mistakes
Even a great patch can look off if it lands in the wrong spot or gets applied the wrong way. A few mistakes come up again and again:
Placing patches on high-stress or high-stretch areas. Elbows, knees, and underarms flex constantly, which weakens iron-on adhesive over time. If you want a patch there, sew it don’t rely on heat alone.
Skipping the “dry fit” before committing. Lay the patch on the garment and step back before ironing or sewing. Chalk-marking the outline first prevents the classic “slightly crooked” regret. And if it’s already too late, here’s how to remove patches from clothes safely without damaging the fabric underneath.
Using the wrong heat or pressure on iron-on patches. Too little heat and the patch peels within a few washes; too much and you risk scorching the patch or the fabric underneath. A cotton pressing cloth between the iron and the patch protects both.
Ignoring the fabric type. Leather, nylon, and waterproof shells don’t take iron-on adhesive well sewing is usually the safer route for these materials. If you’re unsure which method suits your garment, this iron-on vs. sew-on patches comparison breaks down when to use each.
Overcrowding one spot. A cluster of patches can look curated or cluttered depending entirely on spacing. Leaving breathing room between patches even a thumb’s width keeps a multi-patch look intentional rather than chaotic.
Forgetting placement affects meaning, not just looks. A patch on the left chest reads as “official” or brand-like; the same patch on a back panel reads as a statement piece. Think about the message before you commit to the spot.
Final Thoughts: Placement Is Everything
A patch is a small piece of fabric, but where you put it decides almost everything about how it reads classic or bold, quiet or loud, personal or branded. The chest says “identity.” The sleeve says “story.” The back panel says “statement.” And once you’re comfortable with clothes, there’s no reason to stop there cushions, blankets, bags, and even furniture all take patches beautifully when the placement respects the piece.
Start with one spot, get it right, and build from there. That’s really the whole trick: patches reward patience a lot more than they reward covering every inch at once.
Ready to build your own placement plan? Browse custom embroidered patches, chenille patches, and leather patches at Patches Studio, or get in touch if you want help figuring out which patch type suits your project best.
FAQs: Patch Placement
Where is the best place to put a patch on a jacket?
The left chest is the most classic, versatile spot for a single patch. For a bolder look, the back panel works best with one large, centered design rather than several small ones.
Do patches look good on jeans?
Yes — knees, back pockets, and the front thigh are all popular spots for patch jeans, whether you’re covering a rip or simply adding style.
Should I iron or sew a patch on clothes?
Iron-on works well for flat, sturdy fabrics like denim, cotton, and canvas. For high-stress areas like knees and elbows, or delicate/leather fabrics, sewing holds up far longer.
Can patches go on things besides clothes?
Absolutely. Cushions, blankets, cork boards, bags, shoes, and even furniture all take patches well, as long as the surface is fabric-friendly and the patch is applied with the right backing.
How many patches is too many on one item?
There’s no fixed number, but leaving visible space between patches — rather than edge-to-edge coverage — is what keeps a multi-patch look intentional instead of cluttered.
Where should I put a patch on a hat so it doesn’t look off-center?
The front panel, centered directly above the brim, is the safest spot on any cap. If you’re using two patches, mirror them on either side panel rather than stacking them on one side.
Can I put a patch over an existing hole or stain?
Yes, and it’s one of the most common reasons people patch jeans and jackets in the first place. Choose a patch slightly larger than the damaged area, and sew rather than iron if the spot sees regular movement or washing.
Do patches damage clothing if I remove them later?
Sewn patches leave small needle holes that are usually easy to work around; iron-on patches can leave a faint adhesive outline, especially on lighter fabrics. Testing removal on a hidden seam first is the safest approach.
Is it better to buy patches in a matching set or mix different styles?
Fashion placement is about visual balance — centering, spacing, and matching the patch to the garment’s shape. Repair placement is about covering damage first and making it look intentional second, which is why knees and elbows are so common for both.